


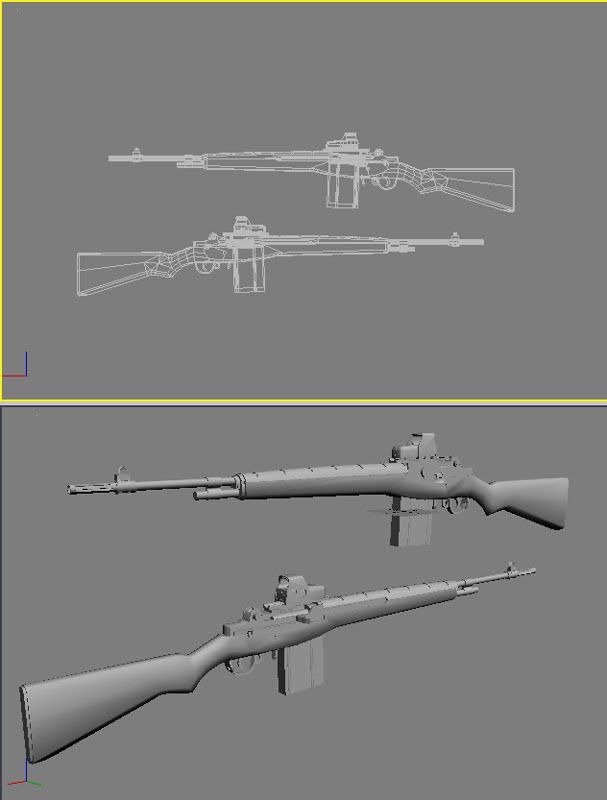
It is very important that when you present a model for critiquing, or even just showing off, you present it in the proper manner so that those who are reviewing it can easily make out the details. Most people use the simple "clay render" render technique. While this works, it does not give a good, clear representation of the details on the model. This tutorial is to help you make decent renders for posting work.
Step 1:To start off, you want to make every mesh the same color. It's best to use some shade of gray.
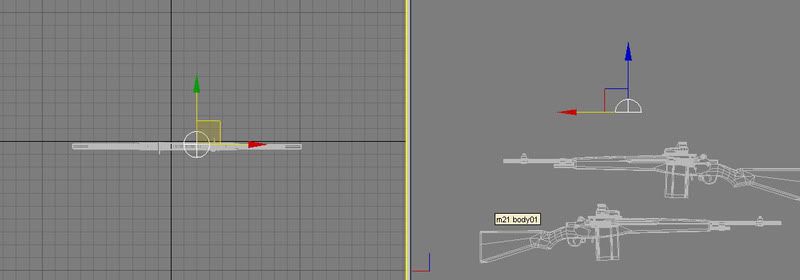
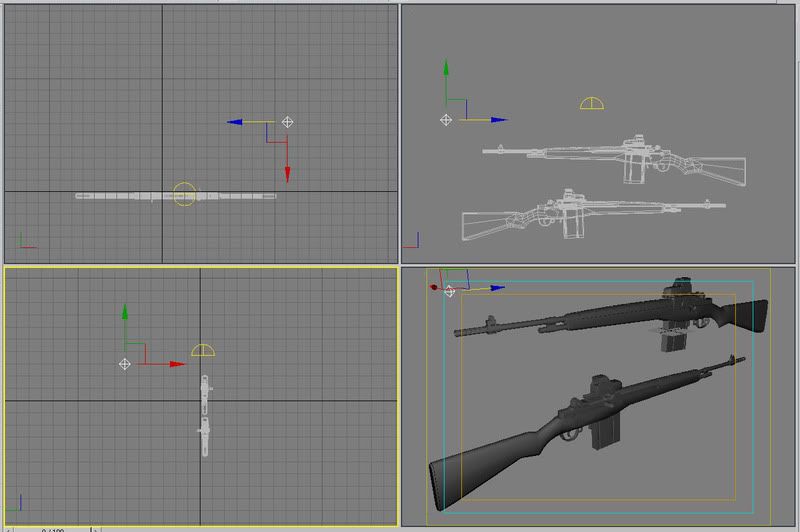
Step 2: Next you need to position the model. You want both sides of the model to be visible. Simplest and quickest way to do this is duplicate the model. Select all + Shift, then drag the model downward. Then click "Ok" on the box that will appear.
After you've duplicated the model you want to rotate it 180 degrees and position it nicely below the original model.
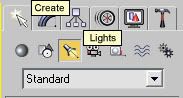
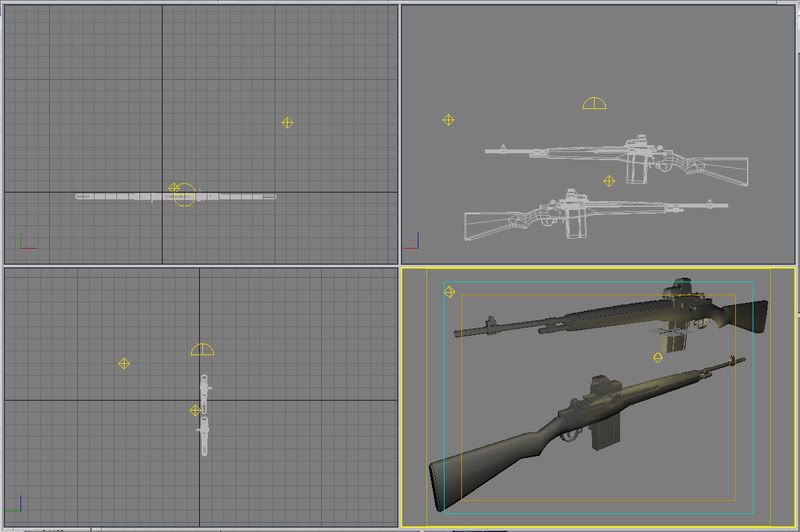
Step 3: Next you're going to need some lighting. What I usually use, and find quite effect is the use of 1 Skylight, and 3 Omni's. So you're going to select the "Create" tab and click on "lights"
Step 4: First you need to setup the skylight. Just click the skylight button and position it over top of the model.
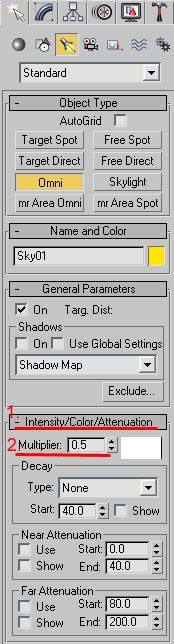
Step 5: Now for the Omni lights. Before we place the omni light we have to change a few things, click on the "Intensity/Color/Attenuation" tab that is below the light select. Then where it says Multiplier, you want to change that to 0.5.
Step 6: Place the first omni near where the Perspective viewport camera will be looking from.
Step 7: Repeat step 5, only this time set the multiplier to 0.4 and change the color (Located next to multiplier, the white box). Any color is fine but for the purpose of this tutorial, we're going to use a shade of yellow.
Step 8: Now place this omni somewhere in between the 2 models.
Step 9: Repeat step 7 this time, using the same yellow color, only now make the multiplier 0.3 and place this one basically opposite to the first omni we placed in step 6.
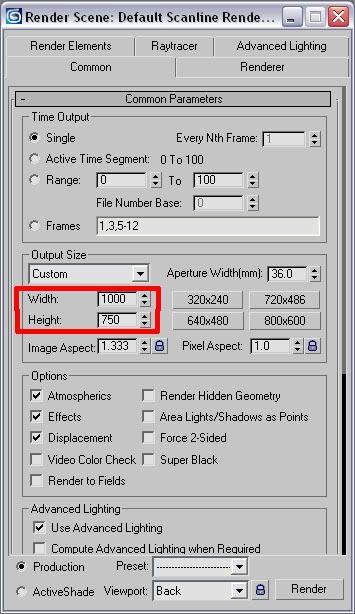
Step 10: Once the lights have all been placed, press F10 to bring of the render settings.
Step 11: Select your resolution. Now when rendering a model, the absolute lowest resolution you want to use is 800x600. It is a better idea to use a higher resolution so the details can be easily seen. For this tutorial we'll use 1000x750
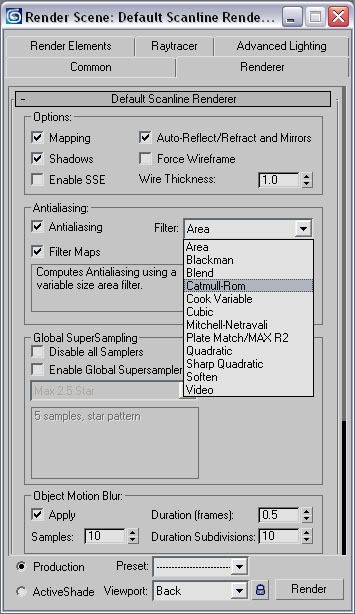
Step 12: Click on the "Renderer tab". Where it says filter, click the arrow and select Catmull-Rom.
Scroll down the menu and where it says "Object motion blur" and "Image motion blur" Uncheck the apply boxes. It should look like this.
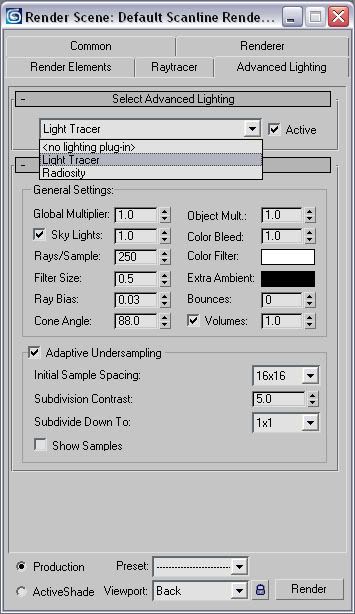
Step 13: Click on the "Advanced Lighting" tab. Click on the drop down menu and select Light Tracer.
Step 14: Click the "Render" button on the bottom of the menu.
Step 15: ???
Step 16: Profit.
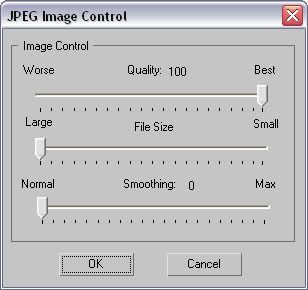
Step 17: When saving the render, save as a .jpg and use these settings
Every modeler has their own technique, some are better than others but this gives you a basic idea of how to make a decent render so people can actually see your model. "Fancy" renders are not for work in progress models. You can post them but they are NOT to be used as the only render to show your work.


Bookmarks