

Hello ladies and gentlemen, as most of you know i'm a trady and i've dabbled in wood work.
I generally build out of necessity rather then for my own enjoyment... simply because it's the only way i can get motivated.
i'm lazy like that. But i love working with wood when i get the chance.
Anyway we had a project coming up for Tafe, basically we have to build a Display cabinet thats over 60% glass on 3 sides, with a variety of different joins, fasteners and a whole heap of other funky stuff.
Most people just made a box, but because i'm mad pro i decided to make something a little bit more outlandish.
and better yet i'll walk you through how to create it yourself.
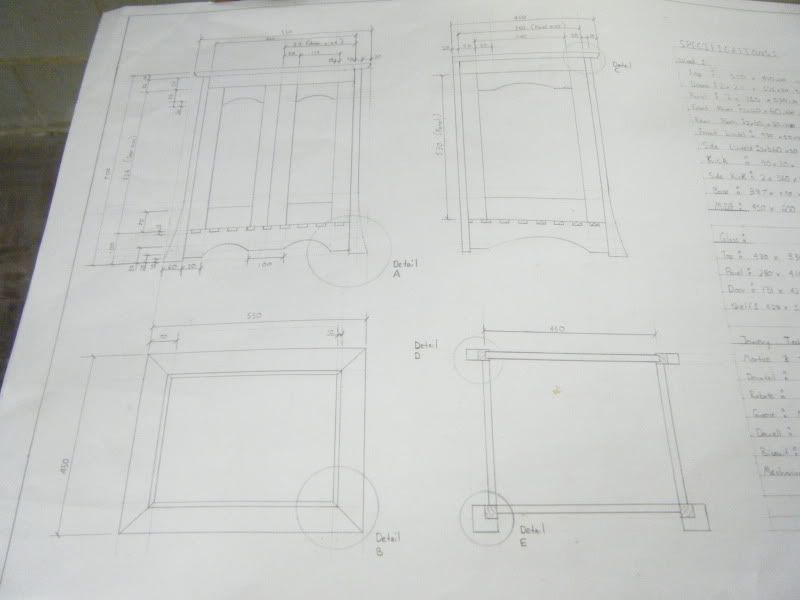
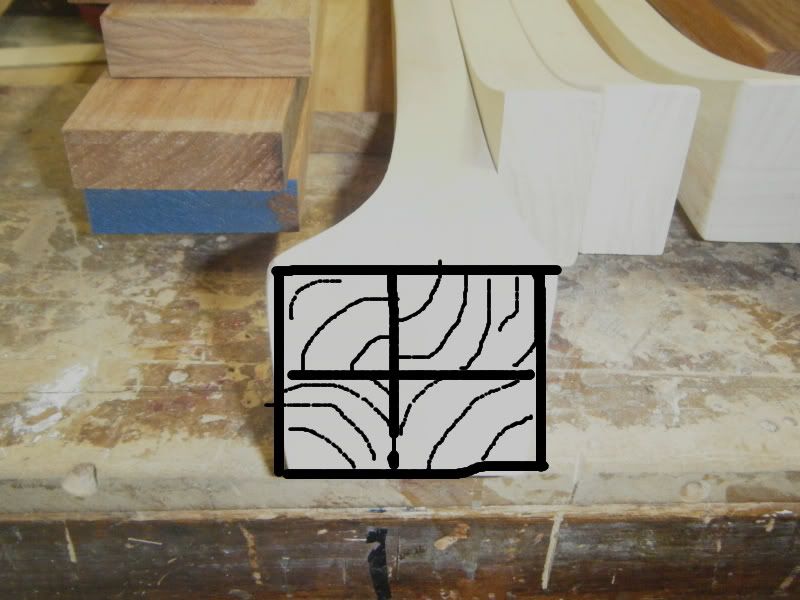
Righto ladies and gentlemen, first up the design.
Looks fairly simple dont it? but hey it'll look nice and trust me when i say it's anything but simple.
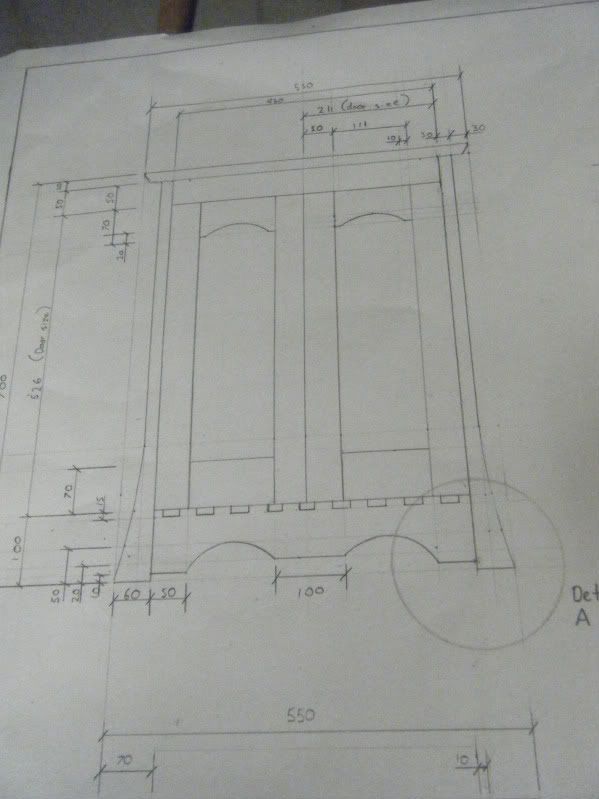
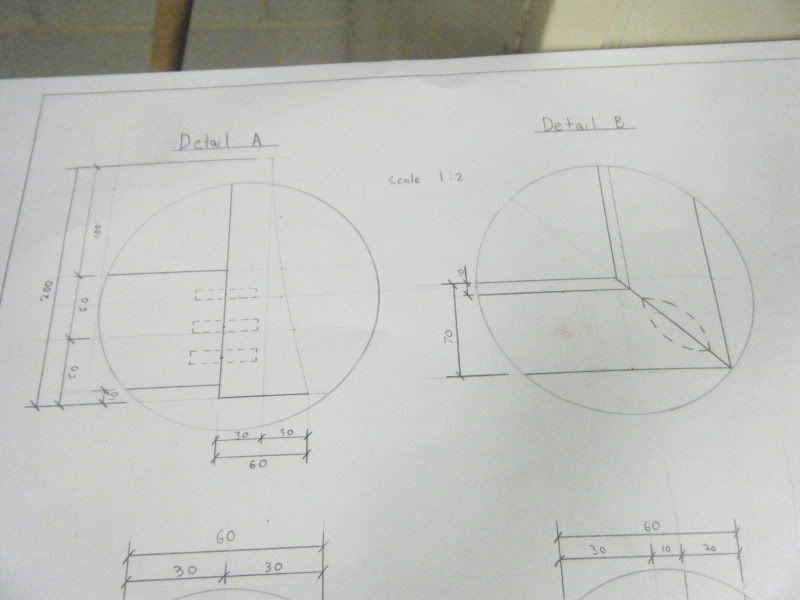
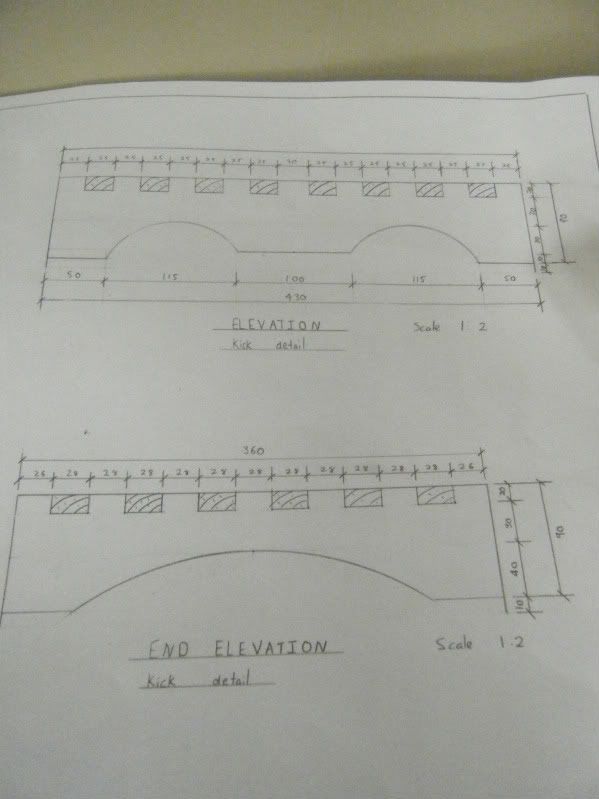
heres a closer look at the front on design, measurements ect
It's designed to be the same height as my computer desk. it's made out of the same wood (well some of it) so it should match fairly well. Take note that it's good to look at. These are simple tricks used on the eye. things such as the legnth of the Flats on the kick rail matching the doors, the overhang being equal to Leg profile. All these things help in making your cabinet look "right".
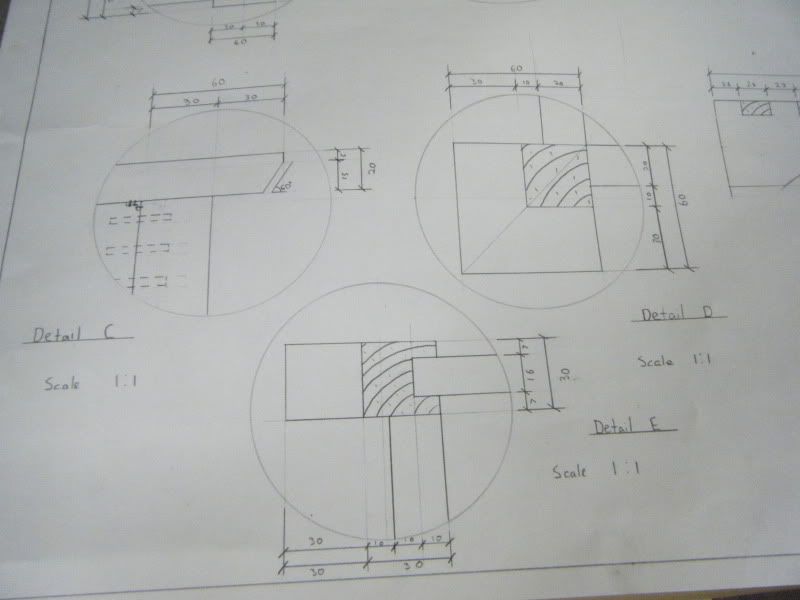
Heres some points of interest in the details
But enough of looking at paper. lets get onto it.
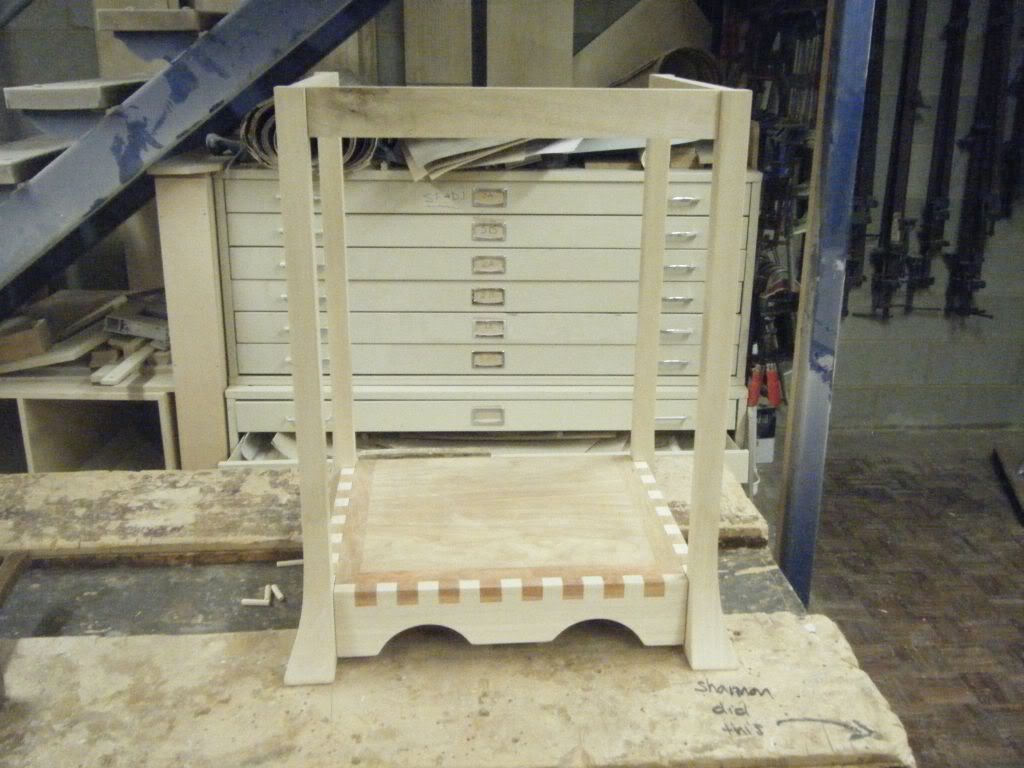
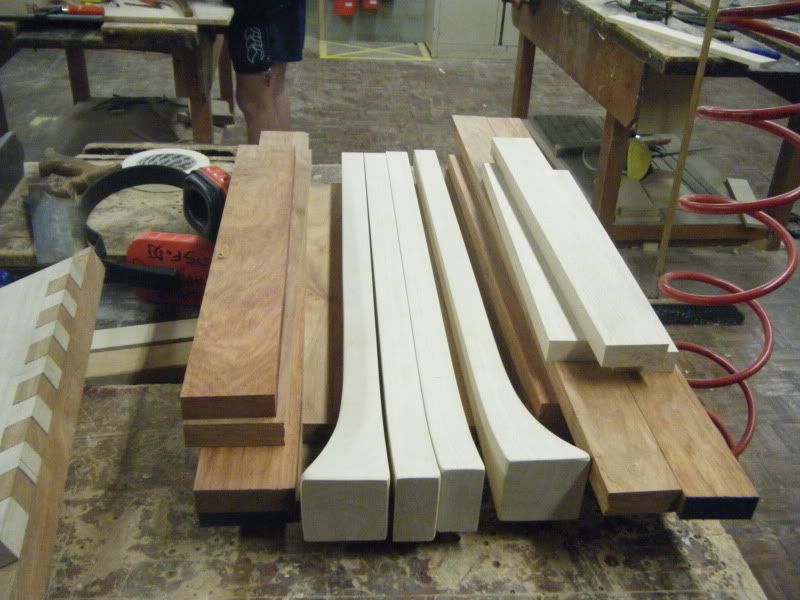
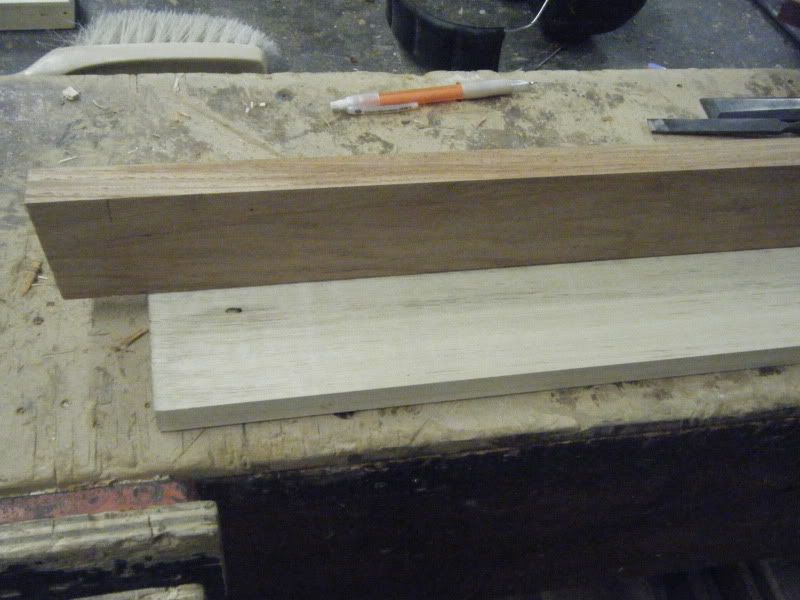
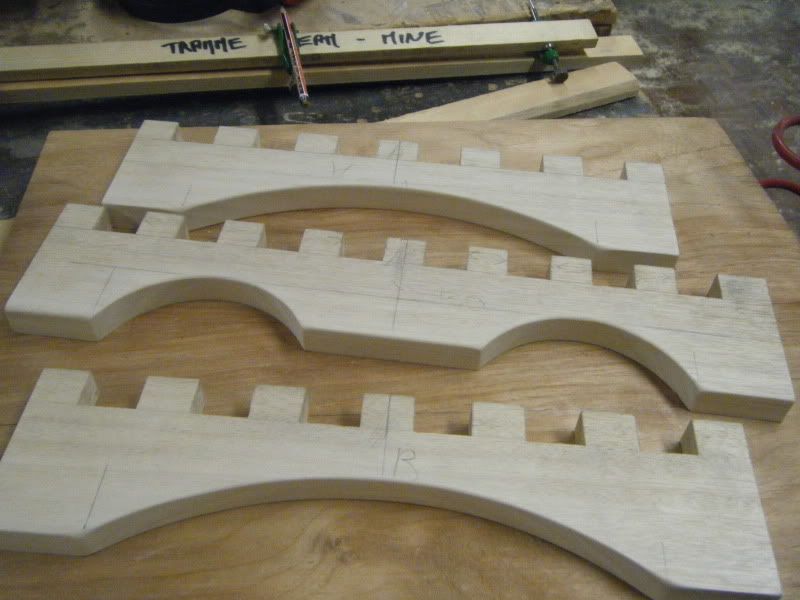
Righto heres the pile of what i've got so far (before snaf promised me sex and pancakes i wasnt taking pictures so i'll try to explain it for you.)
just a general look at them.
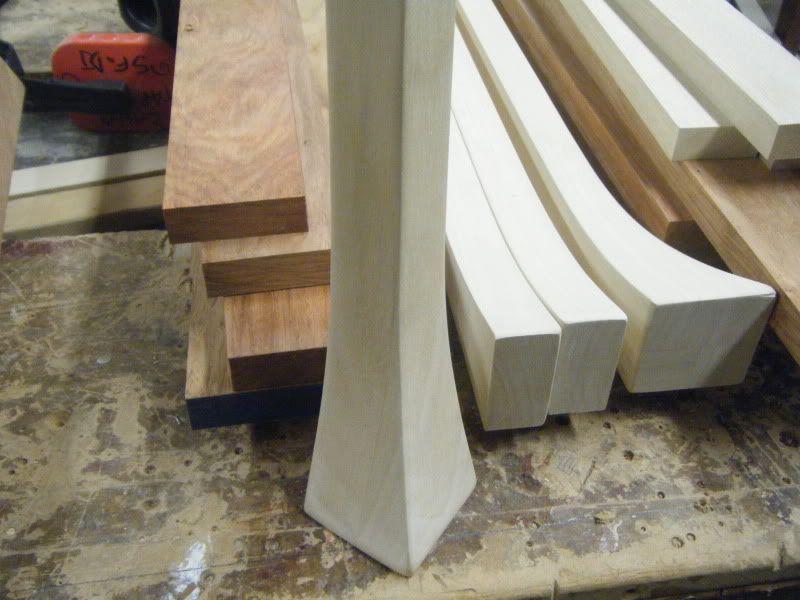
First up the posts.
Glueing
Righto now if you can see on the plan it says these posts taper out 200 mm from the base and do it exponentially. This makes a 30 mm post become a 60mm post.
It's very rare that you get wood that wide to begin with so chances are if you want something like that you'll have to buttjoin them together.
So grab a post and dress it down to 30x30 (have it about 60 mm longer then it needs to be, this just allows play). To do this you
*grab some blocks of wood say at around about 250mm long that are over 30mm square.
*Use a jointing machine to put 2 square sides on each block do this for each block of wood.
*Now these will fit nicely around your post and your ready to glue them together.
*A couple of clamps and lot of glue and your ready to go (IMPORTANT when butt joining things together rub them against each other, this spreads the glue and release's airbubbles and gives you a better join)
*remember to join them to your post at least 210 mm from the bottom
(you only have to do this for the front legs)
Make up a template using a ban saw thats the profile of your post. 30 mm tapering out to 60mm exponentially over 200mm.
you do this so you get a consistent shape for your legs, use this on all 4 legs.
Profiling
now your blocks are joined together you need to cut them to shape.
*using your template mark out the curve of your wood.
*using the bandsaw you cut 2-3mm on the OUTSIDE of your lines (you'll clean it up later)
*IMPORTANT* when doing profiling like this it's important that on your first cut or side you work from not to go all the way through. come in from both sides and leave a peice in the middle say about 20 that you havnt cut.
If you cut all thw way through you wont have a flat side to place on the table to cut out the other side of it. so you do this to get a guide of where you need to cut because when you cut all the way through you loose all the lines you drew.
Now that you've done that take it to the linnisher (bit ass belt sanding machine)
using the corners of the linnisher sand to your lines.
Finish it off with some rough sanding so you get all your grooves out and then some light to make it pretty.
Dock to length.
Congratulations you've made 1 curved stick. now do it again and again and again.
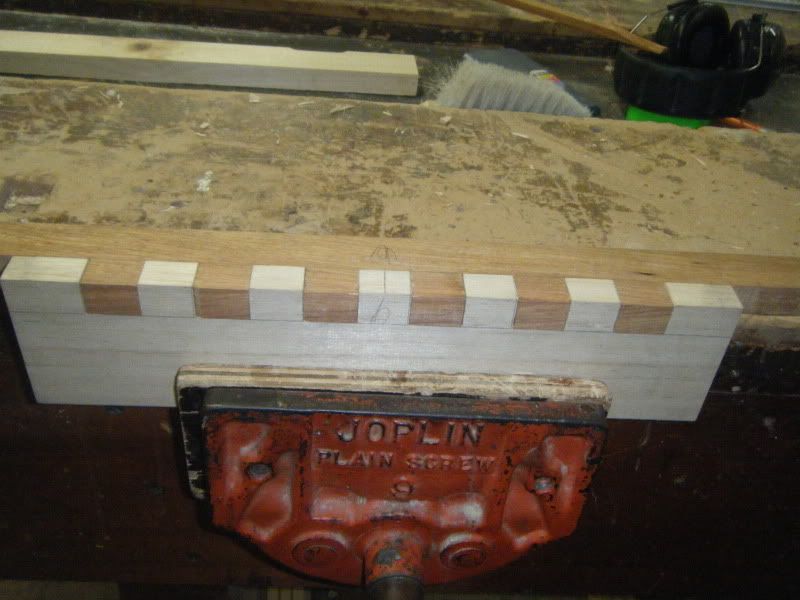
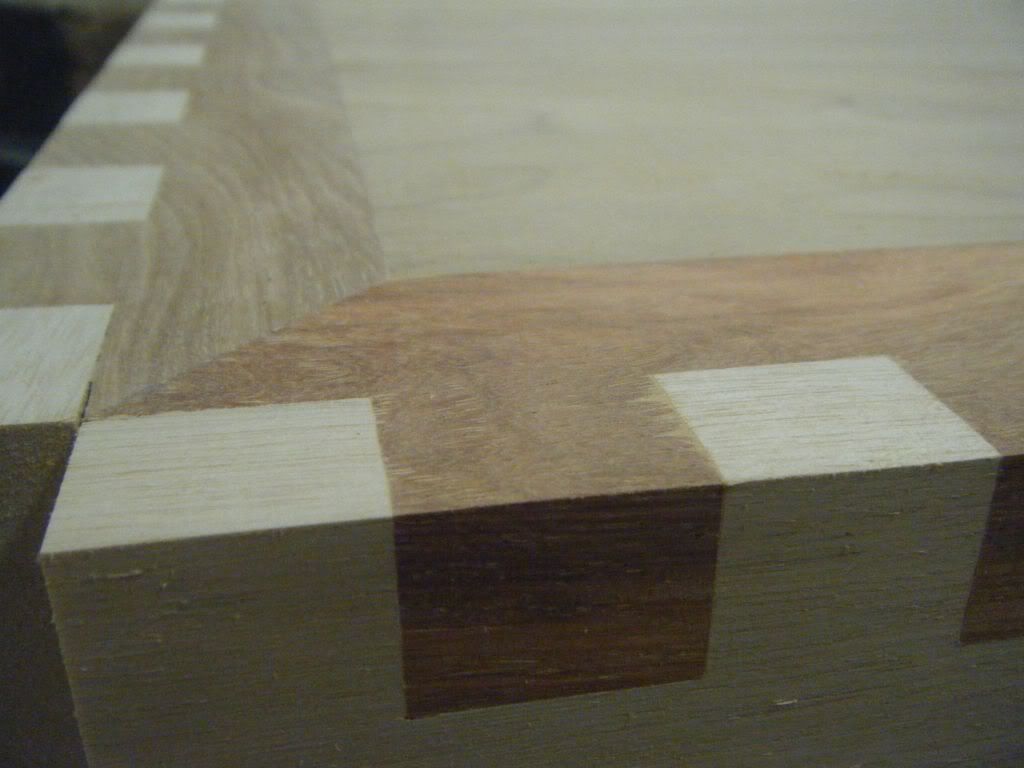
Fingerjoints
REMEMBER TO MAKE THEM LARGER THEN THEY NEED TO BE WORKD FROM THE CENTER OF YOUR WOOD OUT, CUT TO SIZE AFTER JOINT IS FINISHED
now we get going quicker cause i have perddy pictures.
What i'm doing here is using the other part of the joint as a refference for how far i need to cut down. always allow for a 1-2mm overhang, you sand the points off later to make it flush)
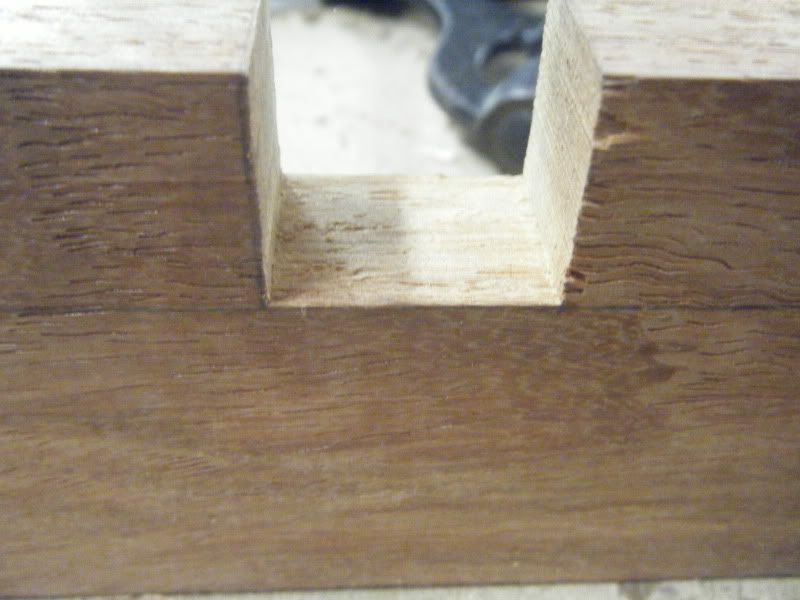
Take out your wood and mark out the size of the finger joints and then gouge a line into the wood half a mm up from the bottom of your line. this just makes it nice and neat to work with later on and prevents chipping and tearing past where you want it to be.
Using a tenon saw and a chisel (or a bandsaw) roughly cut to to where your lines are.
Clean that shit up son.
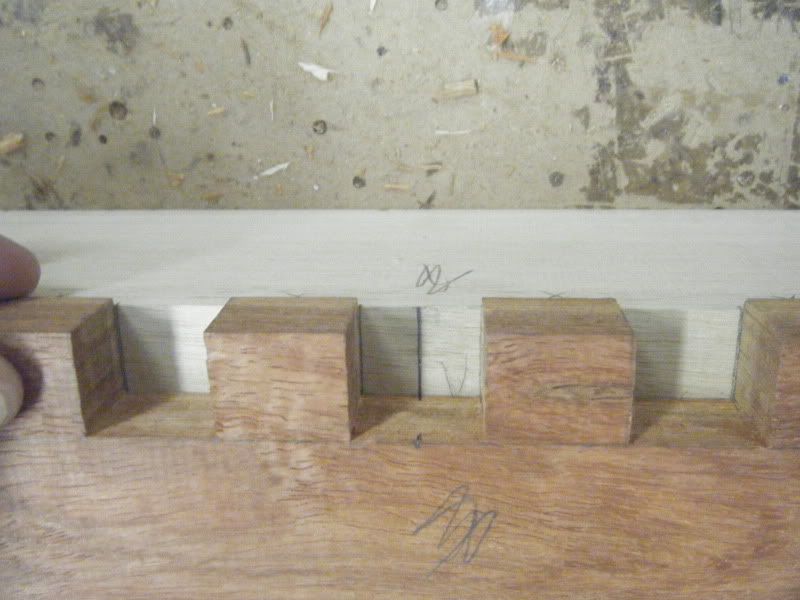
Now use your cut out as a refference for where you need to cut lines for the other part of the joint. (makes it more accurate this way)
Place it on top and just trace your wood.
Mark it out,
rough cut it then using your finished first peice of wood as a guide determine where to shave wood off to get a nice clean neat look.
Work from the middle out and cut your wood to the right length.
Now if you look at detail D you'll see that the kick rail for this cupboard sits flush with the back of the posts. therefore on your finger joints you'll have to Mitre the corners of the bottom shelf of your cupboard to have them fit nice together.
Once thats done Cut a peice of board (or join a few together) and cut to the distance between the bottom.
Using a biscuit joiner join it together and clamp it.
like so
Kicks
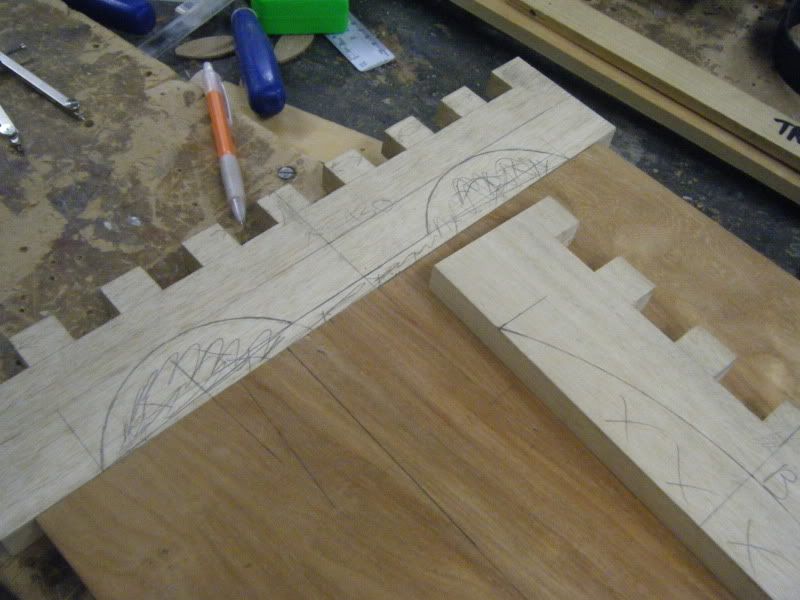
Mark out your measurements.
To get the semicircle you do this.
*draw a line between the 2 points
*grab a compass and make it bigger the half the distance of your line.
*draw a line from both points at the end of your lines.
*where the lines intersect each other Draw a line perpendicular (right angle) to your line through them and project it downwards.
*find a point on this line that makes your compass pass through all 3 points (the height of your semi circle and the ends of your line.
Profiling
Same as your posts.
Rough cut on the bandsaw then use the linisher and sandpaper to finish.
This is what i've got.
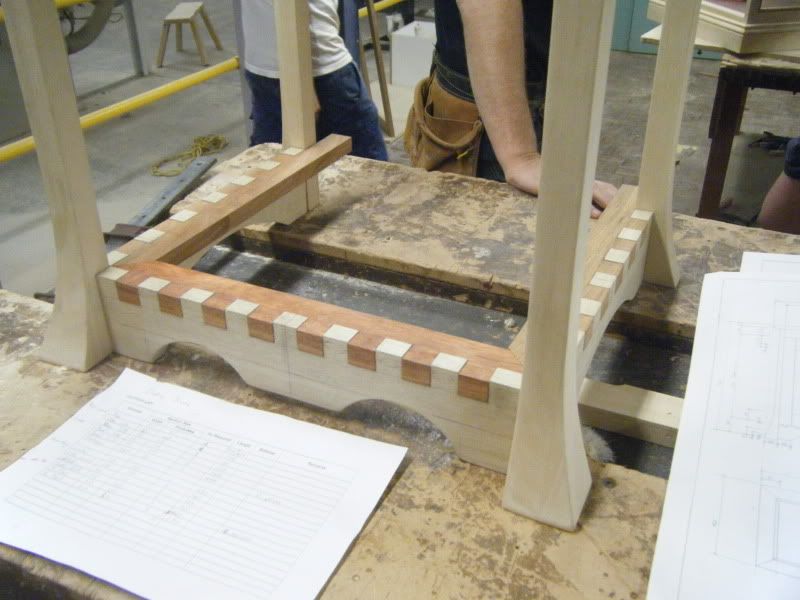
The Finger joints are currently sitting in the clamps glued to the cupboard bottom.
Update: The Journey so Far
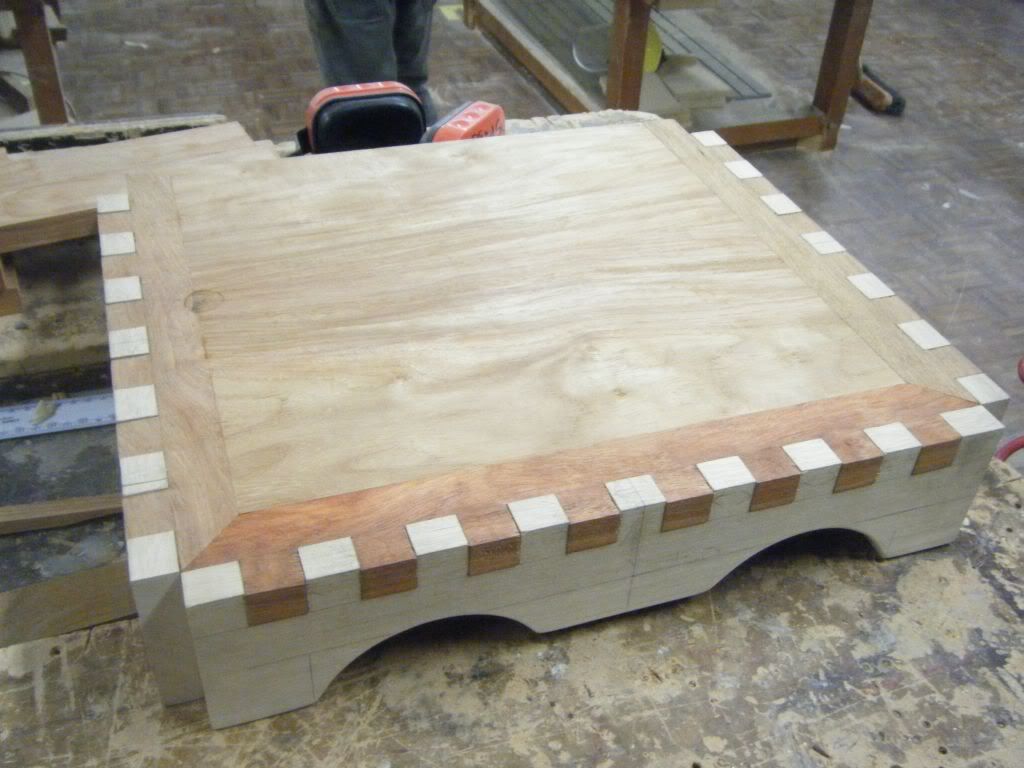
Checking out how the bottom dried overnight.
Gave it a chisel and sanded off the the excess at the joints
Now it's ready to be put together
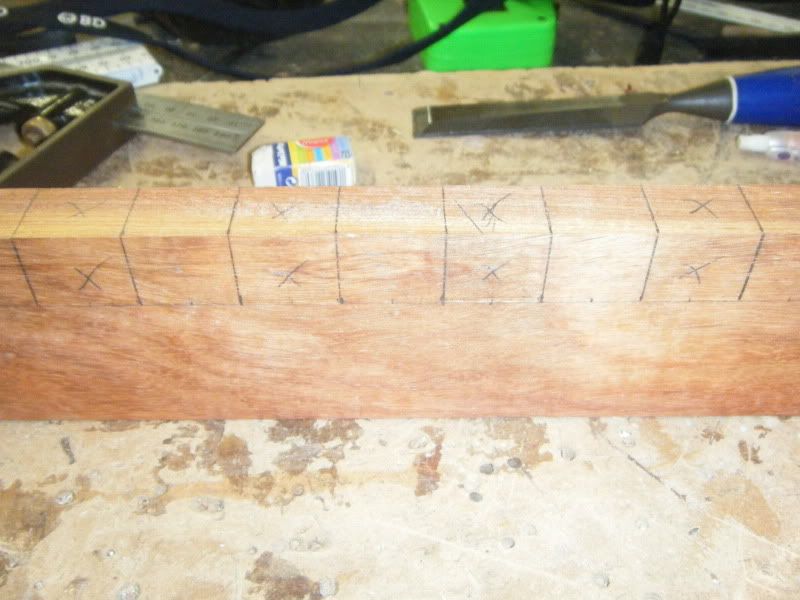
Doweling
Now this is Fairly easy to figure out, it's jsut time consuming.
These are the points for the dowel, When marking these out always work from the Back of the posts and the back of the Kicks. this way it will work out flush when you join them together.
You'll have to stager the holes so they dont run into each other. and remember to find the height of your base, and work DOWN when marking out. this way any little differences for your base wont be an issue.
(if they're slightly different heights the finger joints wont work properly)
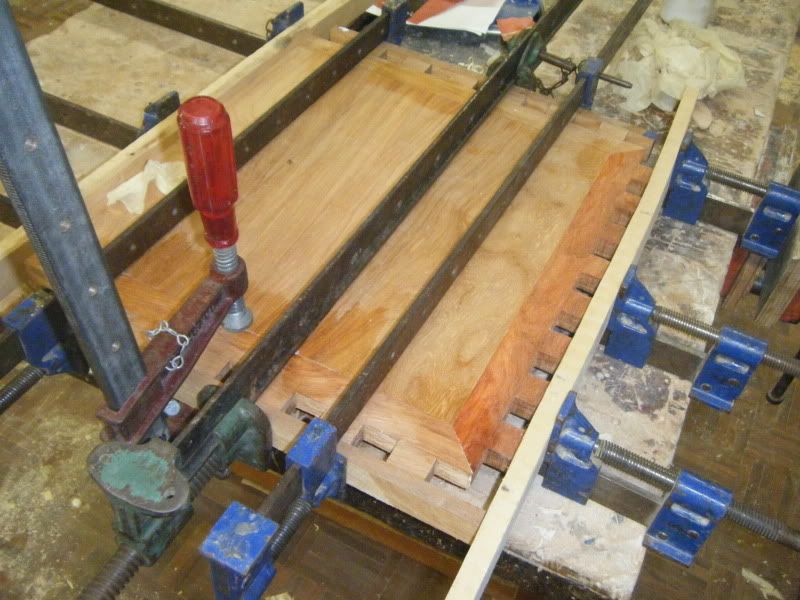
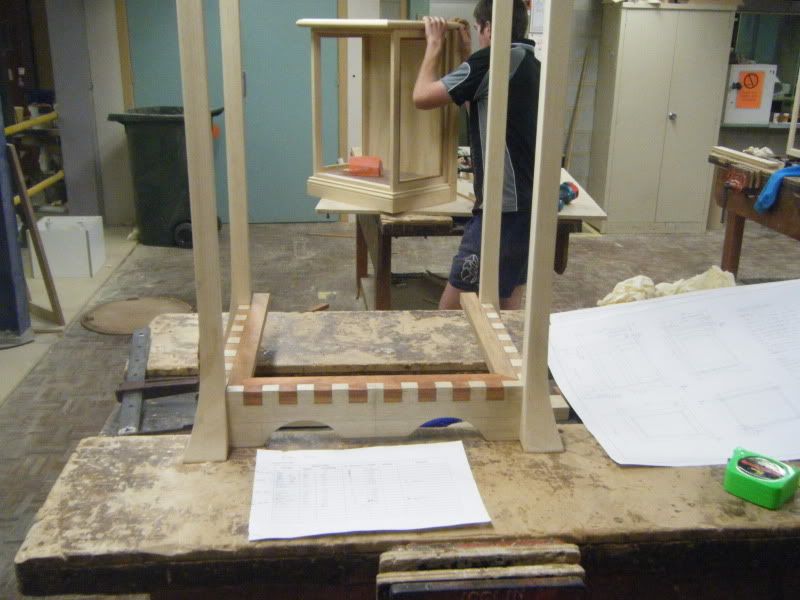
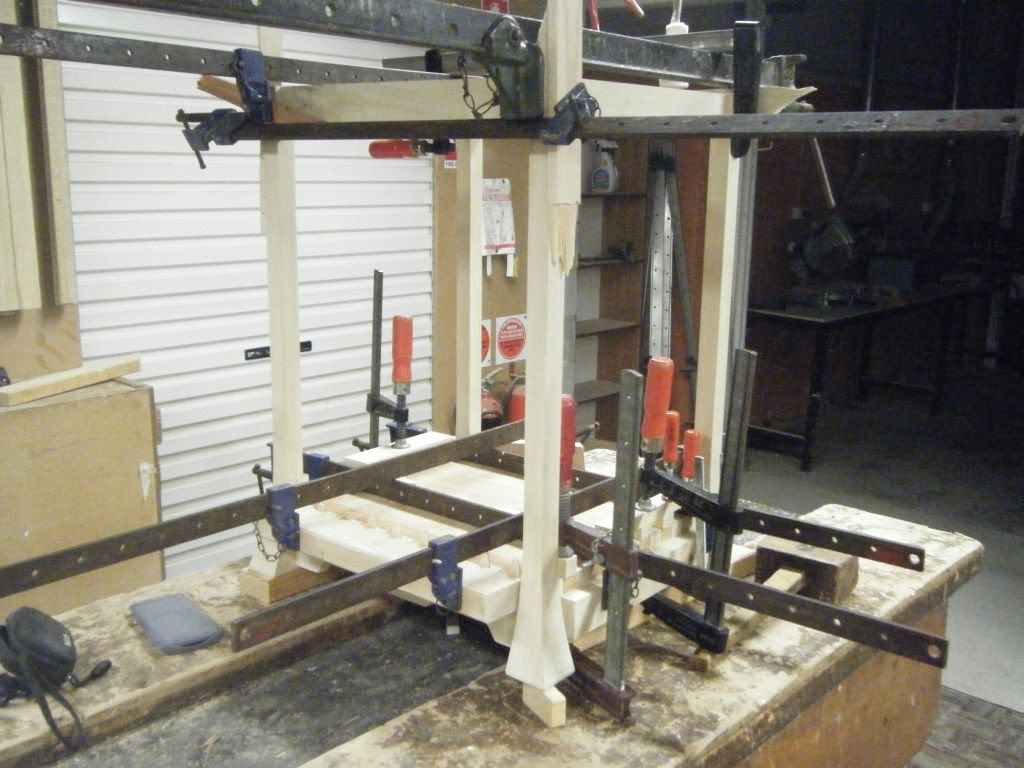
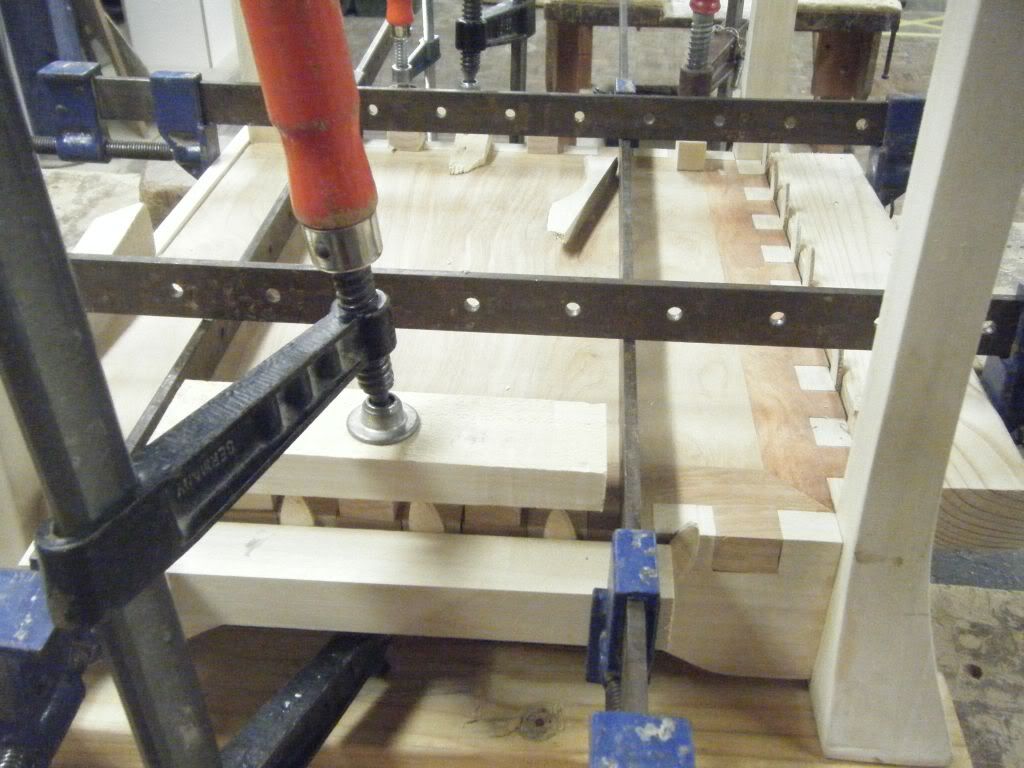
Always do a Dry run to check to make sure your joins and dowels are working properly.
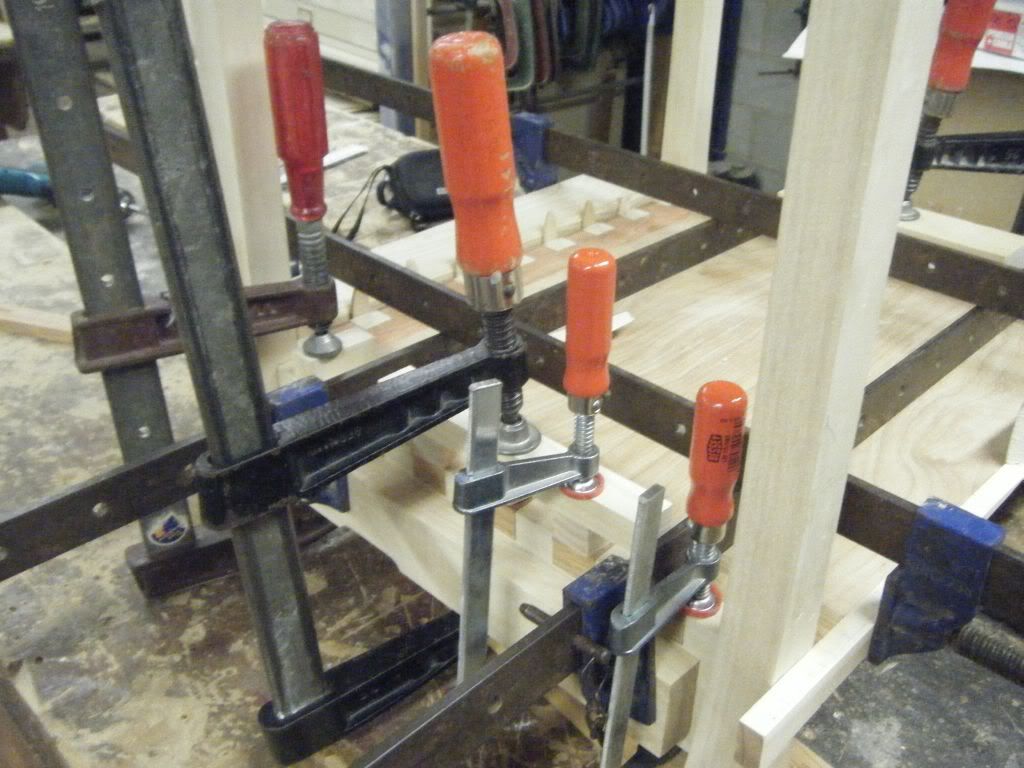
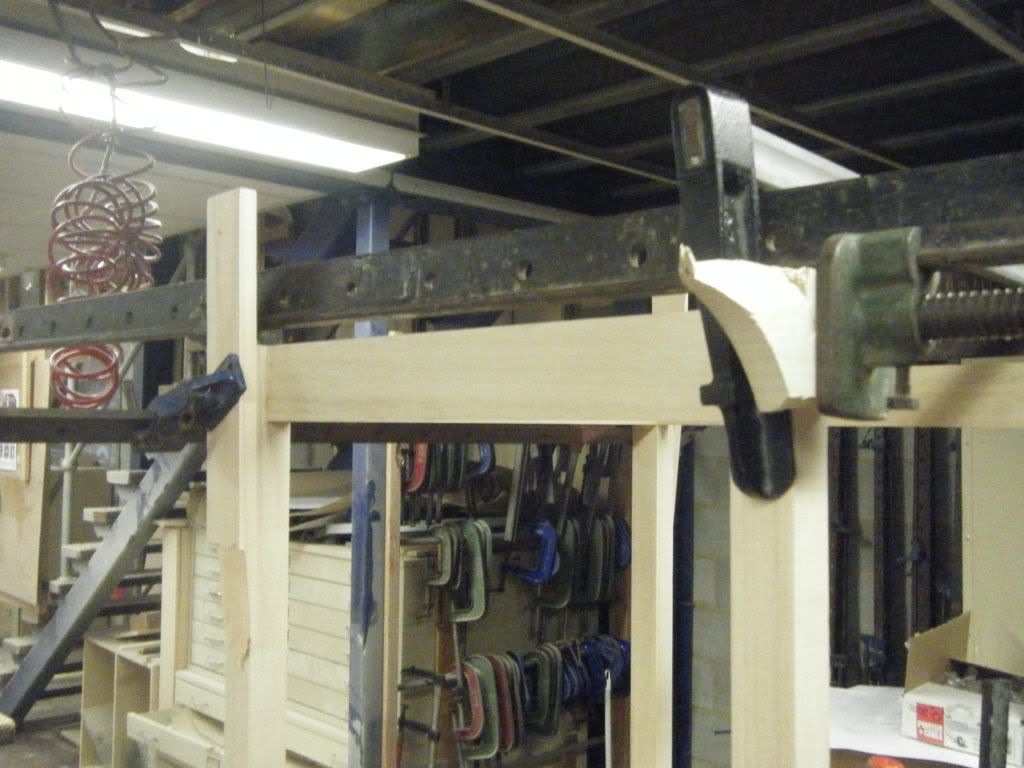
Bitchez dont know bout my additional clamps
Go nuts with these. there is no possible way to explain it.
use as many clamps as you need where ever you need it to pull it together.
fun fun fun.
And thats it for now. It's drying as we speak.
Hopefully i'll get some time to work on it monday after work.
What it will look like


Bookmarks